TwitterFingerprinting tool for Python (library)

Long ago, around 4 years ago already, I implemented a Twitter Fingerprinting tool in PHP that was available for everybody which unfortunately stopped working when the API changed. I was really excited because I could also help the Spanish police with another version of this online tool.

Recently, I decided to implement something similar in Python, but with a considerable difference: not using the Twitter API. There are many reasons:

  • Due to the own Twitter API limitation, you cannot use the application intensively. I do not know the limit nowadays, but long ago it was around 150 requests per hour and IP.
  • I do not usually like that the guys of Twitter know what I am doing with the API.
  • If you use the API, you have to make an account, and use certain credentials. Some people may not like this.
  • Less flexibility. With the API you only can do what you can only do. Obviously.

On the other hand, the basic disadvantage of not using the API and parsing code with regexps directly is that a small change in their website will make the code not work properly.

After saying this, here is the Github link of this small library where you can find more information.

An example of how to use it:

Get all the images uploaded from a specific user:

from TwitterFingerprint import TwitterFingerprint
tw = TwitterFingerprint("google")
tw.obtainLastTweets() # Get all tweets
tw.getPicturesLinks(savePath="images/",includeRTs=0)

Get the language, hashtags, and text (tweet) of the last 30 tweets:

from TwitterFingerprint import TwitterFingerprint
tw = TwitterFingerprint("google")
tw.obtainLastTweets(limit=30,verbose=False)
for tweet in tw.tweets:
	print(tweet["lang"],tweet["hashtags"],tweet["text"])

Get three histograms (months, weekdays, hours) of the last 500 tweets. Interesting when analyzing when someone is using Twitter.

from TwitterFingerprint import TwitterFingerprint
tw = TwitterFingerprint("google")
tw.obtainLastTweets(limit=500)
[histMonths,histWeekdays,histHours] = tw.getHistograms()
NHK Web Easy Reader with direct dictionary content retrieval

As a Japanese language learner, any tool that makes this difficult journey easier is always welcome. I do not want to debate anything about the learning process, so I will just say that, as with any other language, the “reading” skill is very useful as a proof of understanding both grammar and vocabulary. For this reason, everyday I have to say “thank you” for the guys of NHK Web Easy, who upload news in very simple Japanese (the grammar is very simple, the vocabulary is something around “medium level”).

When I go to the university I always read on the metro as many news as I can, but very often I have to switch back to my dictionary because I do not have certain words in my vocabulary. This event makes the reading task more difficult because during the “long” process of memorizing the word (reading+writting), minimizing the browser, opening the dictionary, writting the word and understanding it, I usually forgot what I was reading before. And it is not a matter of memory. When you are reading in a language you are not good at, it is extremely difficult to keep track of everything, especially in Japanese where the grammar is absolutely different from any European language (even more different than Finnish).

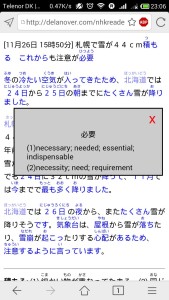
Therefore, I decided to make a tool to avoid all those previously mentioned steps (except for the “understanding part” of course). This tool allows me to read very fast and make the reading way more pleasant. I called this tool “NHK Reader” and, in a few words, is a language parser tool.

Steps:

  1. Takes the text from the news
  2. Uses jisho.org to separate the words (POS tagging)
  3. Uses jisho.org to get the meanings of the words
  4. Pastes that into the webpage (using jQuery)

POS tagging is not something easy, so it does not detects all words correctly and, sadly, I cannot do anything about that since I take the output from jisho.org

A couple of screenshots

GHJWAXNq YYX98bS3

This tool is parsing directly from jisho and nhk, so the regular expressions are hardcoded and it might fail if the owners decide to change the HTML code, but it should not be difficult to fix.

The code will be available on my github when the version 1.0 is ready.

Sumobot Project

This is not even close to the super cool Japanese Robo One robot competitions, but close enough. Sumobot competitions consist of a duel between two robots which have to push each other to make the other leave the arena. There are some specifications that must be followed such as dimensions and weight among others, but the rule is simple: the other robot has to leave the arena.

images

The arena is basicly a black circle within a white margin. This white margin is important because it will help the robot to know where the boundary is.

27400a

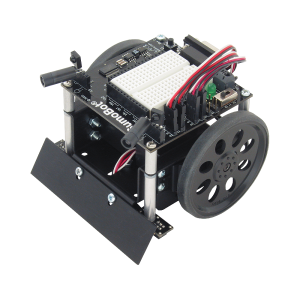
In our class we are using these robots which you have to build them up using components you can see there, called Sumobot. I would like to remark the most important parts:

  • 2 Servo motors
  • 2 Infrared LEDs
  • 2 Infrared readers
  • 2 QTI sensors (to detect the boundary)

By default, if we follow Sumobot’s instructions, we would use its serial port to transfer our programs to its core, but we’re using instead an AVR Butterfly (ATMega 169).

Servo motors are connected to timer counter 1 pins (ports PB5 and PB6) which will output the corresponding signal to make the wheels move.
QTI readers and Infrared readers are connected to other pins (PB0, PB1, PB2 and PB3). In case of QTI readers, when they detect white, the pin will be set to zero, otherwise it will be set to 1. In case of Infrared readers, when they detect an obstacle, the pin will be set to 0, otherwise it will be set to 1.
Infrared LEDs are connected to timer counter 0 pin (port PB4) which is set to a frequency of 38.5 KHz. This frequency is not arbitrary since the Infrared reader is only able to properly read reflected infrared signals under that frequency.

Here we can watch several videos about how it works

Robotic Arm

This project is actually university homework, but it’s so interesting that I decided to upload here the information. I’ve never used such an electronic components before and I have to admit that it was a nice challenge.

This robotic arm is composed of 5 servo motors, which must be controlled in order to use the robotic arm by a couple of joysticks. Proposed environment for this project was the following: We are in a lab dealing with toxic substances, and we need to move them using this robotic arm. Of course, end-users are not suppose to know anything about how the robotic arm is internally built, this means that they don’t have technical knowledgment about mechanics.

My solution
Using the joysticks, we are able to move the robotic arm (back-forward, up-down, left-right) and open-close its grip to catch test tubes.
Additionally, we can see the angle of each servo motor in Olimex’s display and move the robotic arm using Olimex as well. Finally, it is also possible to change the “speed” of robotic arm movements. In my opinion this was completely necessary since the robotic arm is able to move around 10kg and using low weight test tubes makes robotic arm movements so fast by default.

There is also a “security mode” which makes the robotic arm not being move incrementally. Normally when we are using joysticks, the faster we move the joystick, the faster will be moved the robotic arm. But sometimes, we require a more precise control. So, this “security mode” moves always slowly the robotic arm, independently of how fast we are moving the joysticks.

How is it constructed
Each servomotor is connected to each Olimex pin where it is possible to send signals and control them.
Joysticks are connected to Olimex’s ADC, and therefore we can measure and interpret current values.
Servomotors are plugged to 5V while Joysticks to 3.3V. Everything share the same ground.

How to control a single servo motor
I guess this depends on the manufacturer, but I also guess in all cases it’s similar. In order to control a single servo motor, it is necessary to send a signal whose frequency varies depending on the angle it is wanted to obtain. In case of this servo motors, they need 50Hz and sending a 1500ms signal they turn to the “neutral point”. From this point, we can increase and decrease the sent signal and move them from one to another side.

Wrist servo motor is special. As I said, there are 5 servo motors and using joysticks we are able to control 4 of them (up-down, left-right movements). Wrist servo motor has to be always horizontal, and this is achieved by calculanting angles of the rest of them and apply some formula to obtain desired value.

I recorded this video showing how it works: https://www.youtube.com/watch?v=Oms3afMk_NE

Ebay script remainder through Twitter

Introduction
The idea behind this project is simple: a tool which regularly reminds me when my auction (or interested item) is going to finish and its current price. I established ranges and periods of time as following:

Time left Remainder
>12h Every 12h
12h > x > 6h 1 remainder 6h before
6h > x > 2h Every hour
2h > x >30m Every 30 minutes
30m > x > 0m Every 10 minutes

For example, if I register one item whose time left is 2d 16h, the remainders will be set as:

  • 2d 12h, 2d, 1d 12h, 1d, 12h left
  • 6h left
  • 5h, 4h, 3h, 2h left
  • 1h 30min, 1h, 30min left
  • 20min, 10min left.

The register process is very easy: take the ebay ID number of the item (located in the URL), and visit a link such as: ~register.php?link=www.ebay.com/itm/IDNUMBER
After this, the script will generate cronjobs whose work will be “visit” a webpage such as: ~bot.php?link=www.ebay.com/itm/IDNUMBER and a tweet will be published after calculation current time left.
When time left is less than 15min (so, the last remainder), all cronjobs regarding to that item will be erased. This means that you can add as many items as you want.

It is also easy to change some features such as remainders period and tweet’s content.

Screenshots:
Nombre2

Current project: Wireless Music Player

Since the beginning of this year, I’ve been working on a Wireless Music Player. The goal of this project is play all music in a Server while you can control everything from any Client. For the controls, I used PHP because is compatible with any kind of device, from computers to handy devices.

I had to configure many things in the server to make it run without any help, so I only have to turn it on. After this, the server itself creates automatically a hotspot where an additional device can connect to and play anything. The way to play any song is so simple. At first, I have to put the songs I want in a folder (which can have subfolders). After this, I have to create playing lists and add songs. Then, I can play the full playlist.

This project is not finished at all. I would like to improve it, and add many additional features to make it more awesome. At this moment I don’t have many free time so it’s so difficult to work on it, but one of my main goals is use a Raspberry Pi and deploy this on it. This will be difficult, because as I said, I configured many things in the server side and probably I will encounter with many troubles when I want to do the same things. What a challenge!

Here is a sample video where you can see how this actually works. So simple!

Olimex ATmega128 plays Guitar Pro tabs

Little introduction
In my current university (TUAS, Turku University of Applied Sciences, in Finland) we were given a development board called Olimex. The university borrowed us the board, and I really appreciate the idea, because that movement allows students to learn themselves (if they want of course) and get the first (and second, and third..) touch with this board.

In my case I didn’t played with this kind of boards in my life. Actually I bought an Arduino board in order to learn about electronics and stuff, but I didn’t touch it because my lack of free time during this summer, so I want to do my best with this board.

My void background
In class we learned how to play different sounds. Of course, at the end, the cleaning programming style allowed us to make some clear and clean function to play a note, like:

playNote(DO)

where DO (RE, MI, and so on) are pre-defined constants (frequencies). But, I wondered if I could do more, and something more interesting, because if I wanted to play a melody I had to call that playNote function as many times as needed, and I couldn’t adjust even the time I want to play the melody.

As I have a very little background as music player (keyboarder!) I used a lot Guitar Pro, and the first thing I though was whether I could use it in order to obtain the melody I want to play in my board. And of course, I did!

Program itself
Part 1
This is the structure of my program:
-notes.h –> pre defined constants. Here I defined the notes as A1,B1,C1..E5,F5,G5.. where the letter means the note itself and the number means the octave. The content of each constant is its own frequency.
-playMax.h –> this is just the constant which represents the amount of notes to be played. One single line.
-playMelodies.h –> this is the melody represented as an array: int mel[max_mel] = {A3,D4,A3…
-playTempo.h –> this represents the time a note has to be played: double temp[max_mel] = {0.50,0.25
-melody.c –> main program. Here I play all the notes of the melody using a loop and calling a function play_note(frequency,duration).

The reason I took off the amount of notes to be played, the notes to be played and the time for each one, is that I only have to change this files to change the melody I want to play, so the program itself remains the same.

Additionally, I made this program customizable and I can change the offset in order to play a melody more high-pitched or low-pitched, and faster or slower.

Part 2
Guitar Pro allows us to export a XML version of the partiture, so I only needed to built up a parser, an make the files I need for the melody (playMax.h, playMelodies.h, and playTempo.h).
I built this parser in C because I wanted something efficient and recall about this wonderful (and painful some times) programming language.

Building a XML parser is easy (theoretically at least), and the Guitar Pro XML output is particularly easy to understand.
The most important structure was:
note
--step
--octave
--duration
note

How to make this works
-Download the Guitar Pro partiture of the song I want to play (there are thousands on the Internet)
-Export the XML version of that partiture.
-Run the parser which will make the corresponding headers.
-Compile the program and introduce it in the board.
-Play!

Some videos:
Elfen Lied opening
Ievan Polkka
Ode to Joy

JMReversi

This entry is about JMReversi, a free implementation of classic Reversi. At this moment, this application is not in the Store but hopefully will be available soon, because I didn’t have any problem validating it locally.

My personal reason to develop this application is to implement Alfa-Beta algorithm.

My idea is release some day another version with more features that are currently half developed, but now I don’t have time so I decided release it.

Any comment and suggestion is well appreciated.

Windows Store

General features

Version 1.0

  • Play classic Reversi game.
  • Computer decissions are based on Alfa-Beta algorithm.

Screenshots

JMTwitter

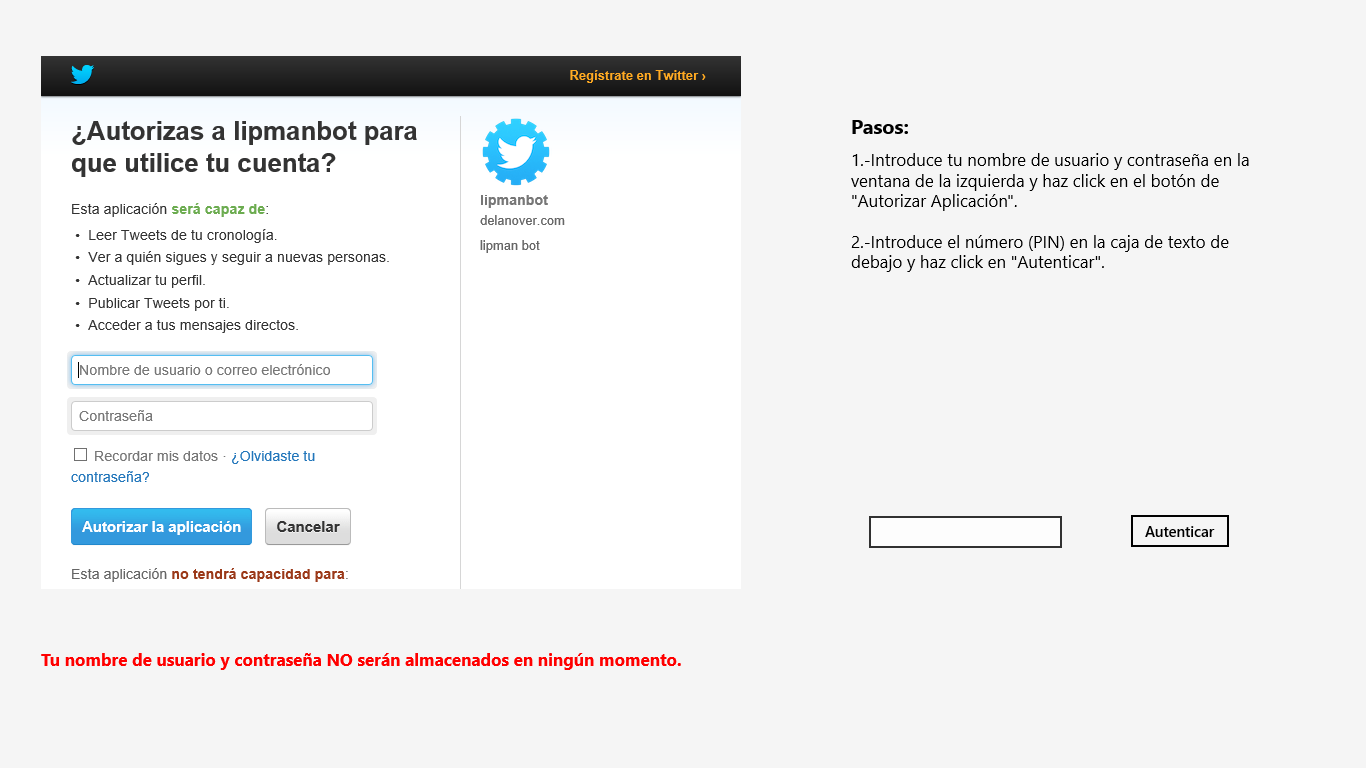
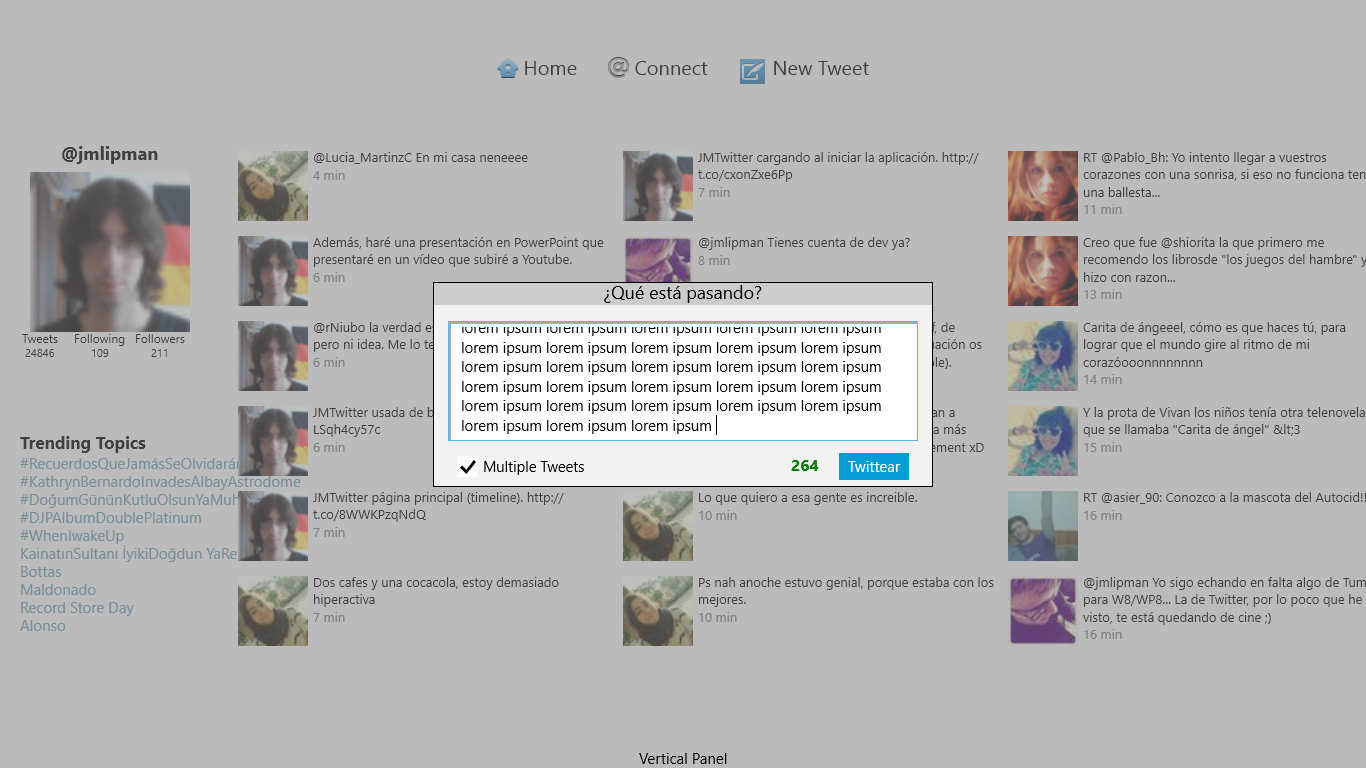
This entry is about JMTwitter, a free Twitter client for Windows 8 (metro style) I’m currently developing. At this moment, the application is not published in the official store (in fact, has been rejected because didn’t pass performance tests, therefore I need to improve it, sure).

I think I will also release the source code when I finish to comment it and have time for that. I would like to continue developing this application and all comments and suggestions will be well appreciated.

General features

Version 1.0

  • Visualize your timeline, mentions and trending topics (refresh every minute).
  • Automatically stores your timeline and mentions to visualize offline.
  • Send tweets and replies.
  • Automatic splited tweets and replies.
  • Snapview mode.

Screenshots

External libraries (credits)

  • LinqToTwitter by Joe Mayo is the library used to interact with Twitter service itselft.
  • SQLite-net by Frank Krueger is the library used to store timeline tweets to have them available offline.