The content of this post is mostly copied from here. The reason I do this is to ensure that that really helpful post will be accessible and to add few modifications.
1. Update and dependencies
# Update apt-get

sudo apt-get update

sudo apt-get upgrade
# Install Dependencies
sudo add-apt-repository ppa:deadsnakes/ppa
sudo apt-get install build-essential
sudo apt-get install cmake git unzip zip
sudo apt-get install python2.7-dev python3.5-dev python3.6-dev pylint
# Kernel header
sudo apt-get install linux-headers-$(uname -r)
2. Install NVIDIA CUDA Toolkit
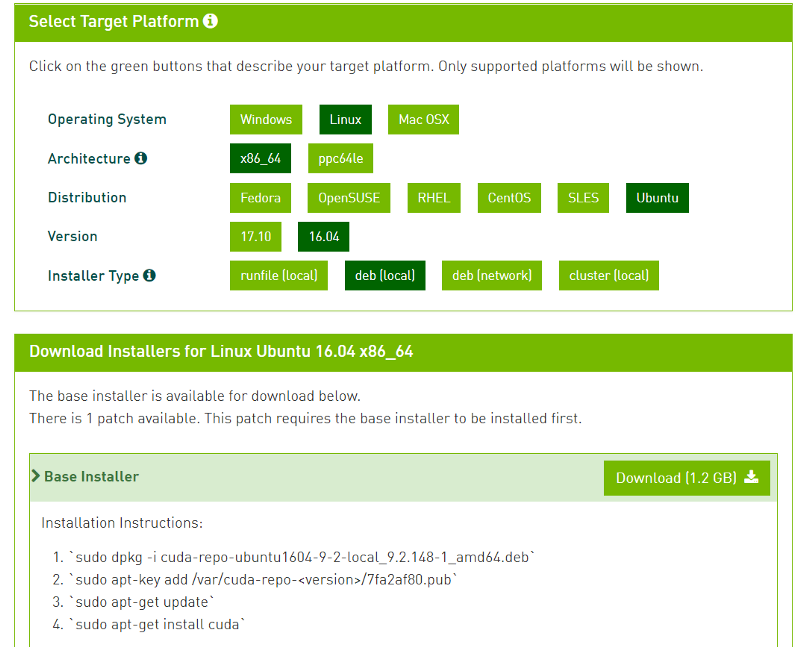
Go to https://developer.nvidia.com/cuda-downloads and download CUDA Toolkit 9.0 (Legacy) for Ubuntu 16.04. Download deb (local) which is 1.2 GB.

sudo dpkg -i cuda-repo-ubuntu1604-9-0-local_9.0.176-1_amd64.deb

sudo apt-key add /var/cuda-repo-9-0-local/7fa2af80.pub

sudo apt-get update

sudo apt-get install cuda-9.0

# Reboot

sudo reboot
vi ~/.bashrc

# add those 2 lines at the end of the file then save it

export PATH=/usr/local/cuda-9.0/bin:$PATH

export LD_LIBRARY_PATH=/usr/local/cuda-9.0/lib64:$LD_LIBRARY_PATH
Then, execute the following commands and check that nvidia-smi works.
source ~/.bashrc

sudo ldconfig

nvidia-smi
3. Install cuDNN 7.2.1
Go to https://developer.nvidia.com/cudnn, login/register, go to cuDNN Download, Archived cuDNN releases and download cuDNN v7.2.1 (August 7, 2018), for CUDA 9.0. Now, for some reason, it seems that that version of cuDNN is only available for CUDA 9.2, but we can just change the download links manually from the CUDA 9.2
cuDNN v7.2.1 Runtime Library for Ubuntu16.04 (Deb): https://developer.nvidia.com/compute/machine-learning/cudnn/secure/v7.2.1/prod/9.0_20180806/Ubuntu16_04-x64/libcudnn7_7.2.1.38-1_cuda9.0_amd64
cuDNN v7.2.1 Developer Library for Ubuntu16.04 (Deb): https://developer.nvidia.com/compute/machine-learning/cudnn/secure/v7.2.1/prod/9.0_20180806/Ubuntu16_04-x64/libcudnn7-dev_7.2.1.38-1_cuda9.0_amd64
cuDNN v7.2.1 Code Samples and User Guide for Ubuntu16.04 (Deb): https://developer.nvidia.com/compute/machine-learning/cudnn/secure/v7.2.1/prod/9.0_20180806/Ubuntu16_04-x64/libcudnn7-doc_7.2.1.38-1_cuda9.0_amd64
Install them in the right order:
sudo dpkg -i libcudnn7_7.2.1.38–1+cuda9.0_amd64.deb

sudo dpkg -i libcudnn7-dev_7.2.1.38–1+cuda9.0_amd64.deb

sudo dpkg -i libcudnn7-doc_7.2.1.38–1+cuda9.0_amd64.deb
Verify the installation
cp -r /usr/src/cudnn_samples_v7/ $HOME

cd  $HOME/cudnn_samples_v7/mnistCUDNN

make clean && make

./mnistCUDNN
You should expect a “Test passed!”.
CUPTI ships with the CUDA Toolkit, but you also need to append its path to the LD_LIBRARY_PATH environment variable
vi ~/.bashrc

export LD_LIBRARY_PATH=/usr/local/cuda/extras/CUPTI/lib64:$LD_LIBRARY_PATH

source ~/.bashrc
4. Install TF and verify it works
pip install tensorflow-gpu
Run
import tensorflow as tf

with tf.device('/gpu:0'):

    a = tf.constant([1.0, 2.0, 3.0, 4.0, 5.0, 6.0], shape=[2, 3], name='a')

    b = tf.constant([1.0, 2.0, 3.0, 4.0, 5.0, 6.0], shape=[3, 2], name='b')

    c = tf.matmul(a, b)
with tf.Session() as sess:
print(sess.run(c))
If this script runs without giving any error you are using gpu version.